 Skip to content
Eckowood Engineering Hardwood Floors
PREPARATION AND GENERAL PROCEDURES
Eckowood engineered floors can be installed directly over most existing floor coverings, except for carpet. Any existing wood flooring that is glued to the concrete must be removed before installation. It is very important to acclimate the wood to the room temperature before installation. Open boxes at both ends to allow air to circulate.
through planks. If planks are covered with a plastic wrap, cut plastic at both ends to allow proper air circulation. Allow planks to lay flat in cartons for 48 to 72 hours prior to installation (or longer in extreme climates).
Air conditioning and heating systems should be in place and operating 14 days before installation, keeping room temperature maintained within a range of 60º to 80º F year-round. Relative humidity in the room/building should be maintained between 30% to 50% year-round. The proper use of a humidifier or dehumidifier is recommended.
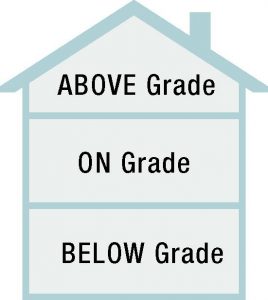
Eckowood Hardwood Planks can be installed using any method over wood, concrete, and other approved subfloors. Above grade, on grade or below grade. Depending on the species, the visual differences from board to board might be pronounced. It is recommended to work from several cartons alternatively. Select the most appealing blend of colors and grain for the best overall appearance. It is also recommended that the direction of the flooring is parallel to the longest wall in the room or hallway. Always allow a minimum of 3/8” expansion space between walls and flooring edge. Use temporary spacing wedges for this purpose (remove upon completion).
PRE-INSTALLATION INSPECTION
It is the responsibility of the installer/owner to inspect each board for visible defects before installation. Any boards with visible defects will be replaced at no cost. If the defective board has been installed, no cost of labor will be paid for repair or replacement. Please refer to installer/owner responsibility.
Eckowood maintains the highest manufacturing standards, however, hardwood flooring is a natural product, and may have occasional natural characteristics that have irregularities within the wood and/or manufacturing defects. Based on accepted standards within the industry, a defect/irregular tolerance up to 5% is allowed. When ordering floor, a minimum of 5% should be added to the actual square footage needed, to allow for cutting and grading.
SUB-FLOOR PREPARATIONS
CONCRETE SUB-FLOOR:
The sub-floor must be structurally sound, dry, and clean. Be sure any new concrete is completely cured for at least 50-60 days (about 8 weeks). Ensure the concrete has a minimum of 3000 psi compression. Over a lightweight concrete (less than 3000 psi) please use a floating installation method. Sub-floor should be flat to 3/16” per 10’ radius. If necessary, hills should be sanded down and valleys should be filled with a recommended underlayment patch. Do not sand sub-surface such as vinyl or synthetic tiles as they may contain asbestos. Before installing over concrete or concrete covered with existing ceramics, marble, stone, vinyl tile, or linoleum, test floor for excessive moisture. The use of a moisture meter is recommended. A reading of over 3 lbs./1000 sq.ft./24 hours by Calcium Chloride test requires the application of a vapor retarder. Another method to test for excessive moisture is to cut 3” x 3” squares of polyurethane plastic and spread those around different areas of the floor for a more accurate evaluation. Tape all edges down, firmly sealing them directly to the floor. Leave down for 24 to 48 hours. If moisture forms under the plastic or if the cement darkens, seal with a concrete sealer.
WOOD SUB-FLOOR:
In most areas, a dry wood subfloor that is ready to work on has a moisture content (MC) of 12% or less. To prepare sub-floor for installation, re-nail any loose areas to prevent squeaking. Sand or plane high spots, and fill low areas. The sub-floor should be flat and should not vary more than 3/16” in a 10’ radius. Check the variance by using the edge of an Eckowood plank to find high or low spots.
OVER RADIANT HEATED FLOOR:
The system must be fully operating at normal temperature for a minimum of 21 days prior to floor installation to dry out residual moisture. The heating system must then be turned off 24 hours prior to installation and must remain off for 24 hours after installation so that adhesive does not cure excessively fast. If the flooring was installed over a radiant heating system, wait 24 hours after installation or until the adhesive has fully cured before turning the system back on. Bring the temperature of the system up gradually, in 5O increments. Never allow the surface temperature of the floor to exceed 82OF (28OC) and avoid dramatic temperature changes; always adjust the system gradually in 5O increments. It is recommended that a dedicated thermostat be installed to allow the temperature of the radiant heating system to be accurately controlled. The MAXIMUM allowable sub-surface temperature over the radiant heated floor is 82ºF.
If the radiant heat system has a concrete subfloor, a 6 mil or better vapor retarder should be installed (this may be part of the flooring underlayment. e.g. a 2 in 1). A foam or resilient underlayment must be installed prior to the installation of the wood floor.
In addition to the procedures described in the installation instructions, approved heat sensors must be installed under the flooring. In the event of flood damage, these sensors will be used to determine whether excessive heat levels were applied to the floor. A minimum of 5 sensors must be placed per 1000 square feet of flooring installed. Space them evenly around the installation area.
INSTALLATION GUIDE: GLUE DOWN
Eckowood recommends urethane adhesive and, if required, concrete sealer for the installation of our products. Carefully read and follow the instructions provided by the adhesive manufacturers for the use and application of their product. Check with your flooring retailer for other adhesives and sealers that are compatible with engineered floors. Be sure to clean any surplus adhesive off the surface of a plank as you go. Do not let it dry. Use a Urethane adhesive remover for this purpose.
The first step is to find a starting line. Snap a line from the wall the width of 2 or 3 boards plus a 3/8” expansion space. Nail a holding board, i.e. 1” x 2” or 1” x 4” length of straight wood along the line, this will help keep the first rows straight and firmly in place. Apply the adhesive and place the first plank down up against the holding board with the groove side facing the wall. Continue laying the planks using the tongue and groove method. Gently tap the planks together using a rubber mallet and press down into the adhesive. Be sure to leave the expansion gap at the beginning and end of row. Continue laying the second row, staggering end joints of boards
from row to row a minimum of 8” and 10” apart. If necessary use blue installers tape to maintain a tight floor.
Repeat row-by-row using the same method until the entire section is complete. Remove the starting board and complete the area from the starting board to the wall.
COMPLETING THE JOB
Roll every 2 to 3 hours and on completion with a 100-lb. to 150-lb. roller to ensure all planks are flat and in contact with the adhesive. Please remove blue installers’ tape within 3 hours. Remove any spacer wedges. Cover all expansion spaces along walls with Eckowood matching moldings. Always nail moldings to the adjacent wall, not the flooring! Clean, sweep, and vacuum installed flooring before use.
INSTALLATION GUIDE: FLOATING
Choosing the floating method for engineered wood, the subfloor must be flat to within 3/16” per 10’ radius. Eckowood will not honor warranty claims for products damaged due to plank movement or flexing due to an uneven floor. (See Subfloor Preparations).
Once subfloor preparation is complete, install a moisture barrier over the concrete subfloor (this may be part of the cushioning underlayment. e.g. 2-in-1 product). Lap up the wall 4”. The plastic can be trimmed at the walls after molding is installed. Use adhesive tape to tape the seams. Overlap the seams 8”. Cover the entire subfloor with foam or resilient underlayment (follow underlayment manufacturer’s instructions for installation).
Install cushioning underlayment running the same lengthwise direction you plan to install the flooring. Butt the edges being sure not to overlap the edges. Tape the seams with adhesive tape (Follow Underlayment Manufacturers Instructions). Decide which direction the flooring will run. Starting from left to right across the floor, begin by snapping a chalk line the width of the plank (e.g. 5”) plus the expansion space, off the starting wall. Lay the first plank with the groove facing the wall and align it with the chalk line. Use spacing wedges to maintain the
expansion space at ends of the plank edge. Take the second plank and apply a tongue and groove wood adhesive (follow adhesive manufacturer’s instructions) to the groove on boards end, and join to the first plank. Continue the same steps until the first row is completed. When reaching the end of the first row cut the last board to fit, maintaining expansion space between the wall and end of the plank. Make sure all end joints are tight and square. Remember to
clean adhesive as you work. Start the second row by using leftover planks from the first row or use a fresh board —cut if necessary— to ensure a staggered end joint of approximately 6” to 10” between end joints of adjacent planks. Apply tongue and groove adhesives to end and side grooves; join to the first row, repeat until the second row is complete. The floor can be installed in successive rows or with a stair-step approach. The
stairstep approach ensures a tighter fit for the first few rows and limit board separation during the initial set up.
Always use a random pattern to begin the installation. Tighten all joints by the use of a wooden tapping block to gently knock the boards in from the tongue side. Do not use excessive force and never use a hammer directly on the plank. Use a special pull bar to tighten joints from the sides. Use clamps or blue installers tape to hold joints
together (Please remove blue tape within 3 hours and remove any tape adhesive residue). Undercut doorjambs and slide plank under the cut for a cleaner look. Repeat all steps and install the rest of the floor. The last row may need cutting lengthwise to fit (remember to allow expansion space). Use a pull bar to pull the last row in place and tighten joints. Use spacing wedges to maintain the space.
COMPLETING THE JOB
Allow the finished floor to be free of traffic for a minimum of 8 hours and before spacing wedges are removed. Be sure all expansion spaces are covered with appropriate moldings. Always nail moldings to the adjacent wall, not the flooring! Never attach any molding to a floating floor. Clean, sweep, and vacuum installed flooring before use.
INSTALLER / OWNER RESPONSIBILITY
The installer assumes all responsibility for the final inspection of product quality. This inspection of all flooring should be done before installation. Carefully examine the flooring for color, factory finish, manufacturing, and quality before installing it. The installer must use reasonable selectivity and hold out or cut off pieces with defects. If the material is not acceptable, do not install it. Contact the seller immediately. Accepting or rejecting the material must be done on full shipment quantity only, not carton by carton or plank by plank. The manufacturer declines responsibility when plank(s) with visible defects have been installed. Prior to installation, the installer must determine that the job-site environment and the subfloors involved meet or exceed all applicable standards and recommendations of the construction and materials industries. These instructions recommend that the subfloor be dry, firm, and flat. The manufacturer declines any responsibility for job failure resulting from or associated with sub-surface or job-site environmental deficiencies. When the flooring is ordered, 5% to 7% must be added to the actual square footage needed for cutting and grading allowance. The use of stain, filler, or putty stick for defect correction during installation should be accepted as a normal procedure.
CLEANING & CARE
Hardwood floors are easy to clean and maintain:
• Sweep, vacuum or dust mop
• Clean spills with cloth, paper towel or napkins
• Maintain with a leading brand of prefinished hardwood floor cleaner* wood floor care
Do Not Damp Mop
Caution: Water and wood floors do not mix! Use only the cleaning products recommended by ECKOWOOD – the manufacturer of your hardwood floor*.
Vacuum Regularly
Small stones, mud, and gritty dirt tracked in from outdoors can scratch your wood floor’s finish. You can reduce wear and tear by placing long-bristled welcome mats at all outside entrances that allow people to wipe
their feet before walking on the floors. Also, vacuum using a soft bristle brush attachment.
Use Proper Chair Glides
Narrow wheels, sharp wooden legs, or metal furniture legs can scratch and dent hardwood floors. Floor protectors are an inexpensive way to protect your hardwood floor investment. Any furniture that rests directly on a hardwood floor should have felt protectors or furniture coasters under each of its feet. For extremely heavy objects such as piano, use wide, non-staining rubber cups. Do Not Use Oil Soaps

Vinyl Flooring
Vinyl flooring can be installed below, on or above ground. Vinyl flooring has three main types of installation. Loose lay, Float and Glue Down, for more details please contact Eckowood Hardwood Floors – [email protected]

